Showing posts with label Recover. Show all posts

Thursday, January 13, 2011

Instant recovery of Hyper-V and other DPM data

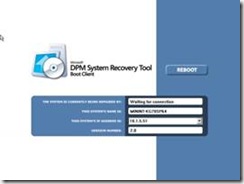
Another post from my CFIT colleague Marcel van den Berg. This time about dBeamerDPM an add-on for DPM that allows IT administrators to achieve a Recovery Time Objective (RTO) of near zero by an instantly recovery  from a Microsoft Data Protection Manager (DPM). Other usage cases for dBeamerDPM are instant setup of a test environment.

For more info read his post Instant recovery of Hyper-V virtual machines and other DPM data

image

Tuesday, November 17, 2009

Disaster recovery using P2V and DPM

One of the interactive sessions on Teched Berlin was about Virtualization and Data Protection Manager. The disaster recovery section of the session had very interesting point of view on using P2V migration and DPM as a disaster recovery scenario. 

A fully virtualized environment will make a disaster recovery scenario a lot easier. You just backup/snap-shot the virtual machines (VHD files and configuration) and when your host dies you just restore them to another Hyper-V host and your back in business.

What about when you have still some physical machines in your environment?

You can use a Bare Metal restore (BMR), but there are some implications with it.
clip_image002

  • First of all you need to have sufficient physical hardware for this. This might not be a problem when you’re planning for a single server failure. This is most likely not an option when you’re planning for a larger (Datacenter) outage. In this case you should have a lot of server on stock just waiting for a failure to happen.
  • The second downside is that for a Bare Metal Restore you need to have, as much as possible, identical hardware. For older servers this might be challenging.
  • Last point is the recovery time needed when doing a BMR. BMR’s can be time consuming, time in which your users will experience a service interruption.

So what alternatives do we have?

Assuming you have also a virtual environment available,

Preparation  Steps

  • Make a Physical to Virtual Migration (P2V) of the machine you want to protect
  • Leave this guest turned off on the Hyper-V machine you migrated it to
  • Make daily data and system state backups of the physical server

You now have an offline virtual machine, with the correct drivers stand-by.

Recovery Steps

When the physical server fails you can activate the offline Virtual machine using the following steps

  • When the physical server is down; Start the Virtual –copy- of the machine
  • Restore the latest data using data protection manager to this virtual machine.

image

Notes:

  • Because of the use of the p2v tool, all correct drivers are on the virtual machine
  • The computer account of the virtual machine could be expired, in this case you need to reset the computer account
  • Make sure you know the local admin account and password of the machine
  • The start of the Virtual Machine could created as a SCOM recovery task
  • The restore of the data with DPM can be scripted with Powershell
  • You need to keep the system state of the physical machine, in case you want to go back to the physical server.

Based on the presentation Data Protection Manager and virtualization better together presentation during Tech-ed Berlin 2009.


Checks Mike’s post for more info an some interesting questions

Friday, October 30, 2009

DPM 2010 and OCS front-end protection

Tom Pacyk wrote a post in 3 parts on protecting and recovering the OCS front-end server role with DPM 2010

Quote: “The goal of this series is to demonstrate how to recover your OCS Front-End’s RTC database in the event of a disaster where your database or disk hosting the RTC database has become corrupted. Or maybe you’ve recovered a server’s installation and configuration, but now need to recover the user information. I’m going to do this in 3 different parts: backing up, destroying, recovering.”

Your OCS Front-End and DPM 2010 Part 1- Backup
Your OCS Front-End and DPM 2010 Part 2- Destruction
Your OCS Front-End and DPM 2010 Part 3- Recovery

Link to Tom’s Blog: http://www.confusedamused.com/

Monday, October 26, 2009

SharePoint Protection with DPM

I’m not the first one to blog about this. But I’m just very impressed with the great documentation available on the Microsoft weblog about protecting and recovering SharePoint (MOSS)

 image

I Just had to share it with you:
DPM and SharePoint - Part 1 - A love/love relationship
DPM and SharePoint - Part 2 - How does DPM protect SharePoint data?
DPM and SharePoint - Part 3 - How does DPM restore SharePoint data?
DPM and SharePoint - Part 4 - Why do I get this error?

Monday, August 17, 2009

Prepare for a DPM server disaster

The DPM SQL database (DPMDB) is the most crucial part of your DPM installation. The database contains all your protection group information and tape\disk catalogs.
When this database gets corrupted (believe me this can happen), you will loss all this configuration data.

When you have a single DPM server implementation, you can protect this database in two ways.

  • Make a backup\Dump to disk: dpmbackup command
  • Make a backup to tape: Create a protection group to include the DPM database

I would recommend to use both techniques to protect your DPM databases.The disk solution allows you to recover the DPM quickly when it gets corrupted. The backup to tape allows you to recover the configuration when the full DPM server has become unavailable.

Make a DPM database backup to disk

  • Use the command DPMbackup –db to create a dump of the database to the folder %program files%\Microsoft Data Protection manager\DPM\Volumes\ShadowCopy\Database Backups.
  • When you schedule this command to run frequently,it is recommended to save multiple versions of the database. With the DPMbackup –db command you cannot specify a alternative location for the database backup. Therefore it is recommended to copy your database dump to an alternative location. This will prevent you from overwriting a good working copy with a more recent corrupt version.

Restore a DPM database from disk

Before you start:

  1. Secure the current DPMDB.BAK database backup, by renaming it: %program files%\\Microsoft DPM\DPM\Volumes\ShadowCopy\Database Backups
  2. Next, create a backup of the running database in DPM  with the following command: dpmbackup –DB Also rename this DPMDB.BAK file to DPBDB_before_restore.BAK

Restore database:

  1. Use DPMSync to attach the database to DPM.
    • DPMSync –RestoreDB –DBLoc (location and name of the database secured in step 1 of before you start) When this database is also corrupt you can use a previous saved version of the database
    • DPMSync takes the DPM service offline and attaches the backed up database to SQL Server.
  2. Run the command DpmSync –sync
    • This will sync the database with the available recovery points
  3. Start DPM 2007 Administrator Console. You now have some protection errors to resolve.
  4. Secure now the working DPM DB running: DPMBACKUP –DB from the DPM server

Make a DPM database backup to disk

Enable local protection (When using the local SQL installation): 

  • Starting with DPM 2007 SP1 it is possible to backup the local files of the DPM server.
  • To enable it you need a powershell command (DPM Management Shell): Set-DPMGlobalProperty –AllowLocalDataProtection $true

Protect SQL database:

  • Create a new protection group
  • Select the local DPM server and select under SQL the DPMDB
  • Use long-term protection using tape
  • Specify the protection schedule

Recover a DPM database from disk
This is a not the most pleasant solution, since you have to uninstall and reinstall DPM2007. You should only use this when the recovery from disk is not possible

  1. create a backup of the running database in DPM  with the following command: dpmbackup –DB ,rename this DPMDB.BAK file to DPBDB_before_restore.BAK
  2. Place the tapes with the most recent DPM database backup
  3. Uninstall Microsoft System Center Data Protection Manager 2007 through the Add/Remove Programs applet in Control Panel.

    Important

    Remember to select Retain disk-based recovery points.

  4. Restart the computer.
  5. Delete the DPM database using SQL Server Management Studio.
  6. Install DPM 2007.
  7. Restart the computer
  8. Install the same level of Service pack and latest hotfixes
  9. Restart the server again
  10. Secure the now clean Database
    • Run the command dpmbackup –DB
  11. Open the Libraries tab on the Management tab of DPM Administrator Console.
  12. Click Rescan on the Actions pane. Go to Updating Tape Library Information for more information on using the Rescan option.
  13. Select the library from the list and click Inventory libraries… and perform a detailed inventory from the Actions pane.
  14. Select the imported tape from the list and click Recatalog imported tape on the Actions pane.
    • Do this for all tapes on which the DPM database resides
  15. Open the Recovery tab from DPM Administrator Console.
  16. Select the DPMDB by expanding the External Tapes node.
  17. Click Recover on the Actions pane.
  18. Restore the database files to a separate folder
  19. All DPM and SQL services must be stopped.
  20. Rename the following Database files .\DPMDB:
    • a) DPMDB2007RTM.mdf to DPMDB2007RTM.mdf.old
    • b) DPMDB2007RTM_log.ldf to DPMDB2007RTM_log.ldf.old
  21. Copy the restored database files to the location .\DPMDB
  22. Start first the SQL services, next start the DPM services
  23. When all services are started again:Run the command DpmSync –sync
    • This will sync the database with the available recovery points
  24. Start the DPM administrative console
    • If this works > DPM should be up, you now have some protection errors to resolve
    • If this not work try step 15 to 23 for with the two other versions of the database

***Secure the now working database Run the command dpmbackup –DB

Monday, July 20, 2009

Exchange 2007 Restore with DPM and PowerShell


Set-up Overview

This post shows how to recover a mailbox using DPM and Powershell commands

For the examples in this post we use the following set-up

  • Exchange 2007 CCR cluster: EXc01
  • Storage group to recover from: SG01
  • Mailbox to recover from: MBXStore01
  • User to recover: Matthijs
  • User to recover mail to: Manager
  • Disk for recovery storage group: E:\
  • Name recovery storage group: Recovery Storage Group

High-level steps for a recovery

  • Create recovery storage group;
  • Restore data to Recovery Storage Group;
  • Copy/merge mail to target mailbox;
  • Remove Recovery Storage Group.

Restore to recovery Storage Group

Task description

Example

  • If you do not have an existing Recovery Storage Group, create one by using the new-storagegroup cmdlet in Exchange Management Shell.
  • Logon to the Active node of the Exchange cluster
  • Start the exchange management shell
  • Create a Recovery Storage Group (RSG) by running the following Exchange Management Shell cmdlet: [PS] new-storagegroup -Server [servername] -LogFolderPath [log file path] -Name “Recovery Storage Group” -SystemFolderPath [database directory] Recovery

new-storagegroup -Server exc01 -LogFolderPath E:\RSG -Name “Recovery Storage Group” -SystemFolderPath E:\RSG -Recovery

  • Add a recovery database to the RSG by running the following Exchange Management Shell cmdlet: [PS] new-mailboxdatabase -mailboxdatabasetorecover [database_name] -storagegroup [Server_name\RSG_name] -edbfilepath [database_path]

This creates a mailbox on exchangeserver1\RSG\DB11. The .edb file name must be the same as the .edb file name for the mailbox you are recovering.

new-mailboxdatabase -mailboxdatabasetorecover exc01\SG01\MBXStore01 -storagegroup "exc01\Recovery Storage Group" -edbfilepath E:\RSG\MBXStore01.edb

  • Logon to the DPM server
  • start DPM administrative console
  • Select the recovery TAB
 
  • On the left side of the window select the Exchange cluster for which you want to perform a system state restore
  • Expand the domain name, expand the cluster name
  • Expand All protected data Exchange data
  • Select the storagegroup that contains the mailbox to restore
image
  • In the middle of the window
  • (lower screen) First select the mailbox store and select the users mailbox
  • (Uper screen)select the data and additionally the time of the mailbox to restore.
  • In the right side of the click recover
image
  • The recovery wizard start
  • Check the selected settings and click next
  • In the Select recover type window, select Recover the mailbox to an Exchange Server and click Next
image
  • In the specify destination type:
  • Exchange server: [Exchange mailbox cluster] EXC01
  • Storage group name: Recovery Storage Group
  • Database name: [RSG_databasename] mbxstore01
  • In the specify recovery options window, leave all settings default and click Next
  • In the summary window, check all settings and click recover
  • In the Recover status window, check the status and click close
image
     

Restore mailbox content to other mailbox

Task description

Example

  • Logon to the exchange cluster again
  • Open the Exchange management Shell
 
  • Restore the content of a mailbox to another mailbox in a special folder
  • Start by running the following Exchange Management Shell cmdlet: restore-mailbox -RSGMailbox [mailbox in RSG*] -rsgdatabase [RSG_Name\Mailbox_database_name] –baditemlimit 10-id [target_mailbox*] -Targetfolder [target_folder]

*Use the display name

restore-mailbox -RSGMailbox "Matthijs" -rsgdatabase "Recovery storage group\MBXstore01" –baditemlimit 10 -id "manager” -Targetfolder "restore van Matthijs 20090704"

  • The confirmation question will be displayed. Check the action described and Click Y

Confirm

Are you sure you want to perform this action?

Recovering mailbox content from the mailbox 'Vreeken, Matthijs' in the recovery

database 'EXC01\Recovery Storage

  • The mailbox restore is in progress
 
  • The results are displayed
 
  • In outlook there is a new folder created with the content of the restored mailbox
 

Restore lost mail to original mail box merge

Task description

Example

  • Logon to the exchange cluster again
  • Open the Exchange management Shell
 
  • Restore the content of a mailbox to another mailbox in a special folder
  • Start by running the following Exchange Management Shell cmdlet: restore-mailbox -id [mailbox in RSG*] -rsgdatabase [RSG_Name\Mailbox_database_name] –baditemlimit 10

*Use the display name

restore-mailbox -id "’matthijs" -rsgdatabase "Recovery storage group\MBXstore01" -baditemlimit 10

  • The confirmation question will be displayed. Check the action described and Click Y
 
  • The mail restore is in progress
 
  • The results are displayed
 
  • In outlook there is a new folder created with the content of the restored mailbox
 

Other useful restore command:

Restore only emails received/send between specify data:
Restore-mailbox _RSGMailbox <Mailbox_name_In_RSG> –RSGDatabase <RSG_Name>\<Mailbox_DatabaseName> –ID <Mailbox_Name_To_restore> –TargetFolder <Folder_Name> –StartDate <Start_date> –EndDate <EndDate>


Remove recovery storage group

Task description

Example

  • Logon to the exchange cluster again
  • Open the Exchange management Shell
 
  • Dismount the database with the command: dismount-database -identity "[server_name\RSG_Name\Mailbox_database_name]”

dismount-database -identity "exc01\Recovery Storage Group\MBXstore01"

  • The confirmation question will be displayed. Check the action described and Click Y
 
  • Remove the mailbox from the Recovery Storage Group with the command: Remove-mailboxdatabase –identity <server_name\RSG_name\Database_name>

Remove-mailboxdatabase -identity "exc01\recovery storage group\MBXstore01"

  • The confirmation question will be displayed. Check the action described and Click Y
 
  • The move the Recovery Storage group with the following command: remove-storagegroup –identity <server_name\RSG_name>

remove-storagegroup –identity “exc01\recovery storage group”

  • The confirmation question will be displayed. Check the action described and Click Y
 
  • The recovery storage group has been removed from exchange.
 
  • Now remove the files from the Recovery Storage Group directory

E:\RSG\*.*

Monday, June 29, 2009

Exchange mailbox of user from other domain not showing under recoverable item

I run in to a rather strange issue with restoring mailboxes for a customer DPM implementation.
They have an Exchange 2007 SP1 CCR cluster on Windows 2008 SP2 in domain A.

The Exchange cluster is protected with a DPM SP1 server on Windows 2008 SP2 also in domain A. The Exchange server hosts mailboxes from users in many different domains but in the same forest.
The creation of recovery points works without errors and the log files are cleared as expected.
The issue is with recovering a mailbox. When selecting the recovery tab in the DPM administrative console, and select the Exchange cluster, then the storage group and then expand the mailbox store. Here under recoverable item I would expect to see all mailboxes in this mailbox store but instant we see only some of the mailboxes. Infect only the mailboxes of users located in the same domain as the Exchange server (domain A).Recovering the mailboxes is not a problem. When doing a recovery of the mailbox store to the recovery storage group all mailboxes in that mailbox store can be recovered this includes the mailboxes of users in other domains.


UPDATE: There is a hotfix rollup package for System Center Data Protection available that fixes this and 13 other issues. The hotfix number KB 968579 (thanks to Nagesh [MSFT] for pointing me in the right direction).
This also brings me to another important link: Recommended hotfixes for Microsoft Data Protection Manager 2007 systems.

Monday, June 22, 2009

Restore single files form System drive on Windows 2008

DPM allows you to do a System state back-up of Windows 2008 server. Actually a full backup of the c-drive is performed for the Windows 2008. But how can you restore other files than the system state from this backup. There is no option for this in the DPM administrative console. But there is a work around for this. The trick is that Windows 2008 uses a VHD file for the backup

  • First you should perform a system state restore for the specific machine using DPM. Specify a directory where you like to place the restore data (This could be any machine with a DPM agent) ***The most recent copy of the system state backup is already located on the target server in the directory WindowsImageBackup***
  • Now you need to install the tool VHDmount from the virtual server 2005 sp1 setup. You can download this file for free from the Microsoft site.
  • On your management station or DPM server, start the virtual server set-up and choose a custom installation. Select vhdmount and deselect all other options.


  • Wait till the set-up is completed.


  • Copy the ##name###.vhd file from the system state restore directory to the server you just installed the vhdmount tool on.

  • You now can mount the backup with the command vhdmount /m /f ##name##.vhd

  • The vdh file is now mounted to an available drive letter and you can browse the files and directories

  • The command vhdmount /u ##name##.vhd, dismounts the VHD file again.